
Desserts
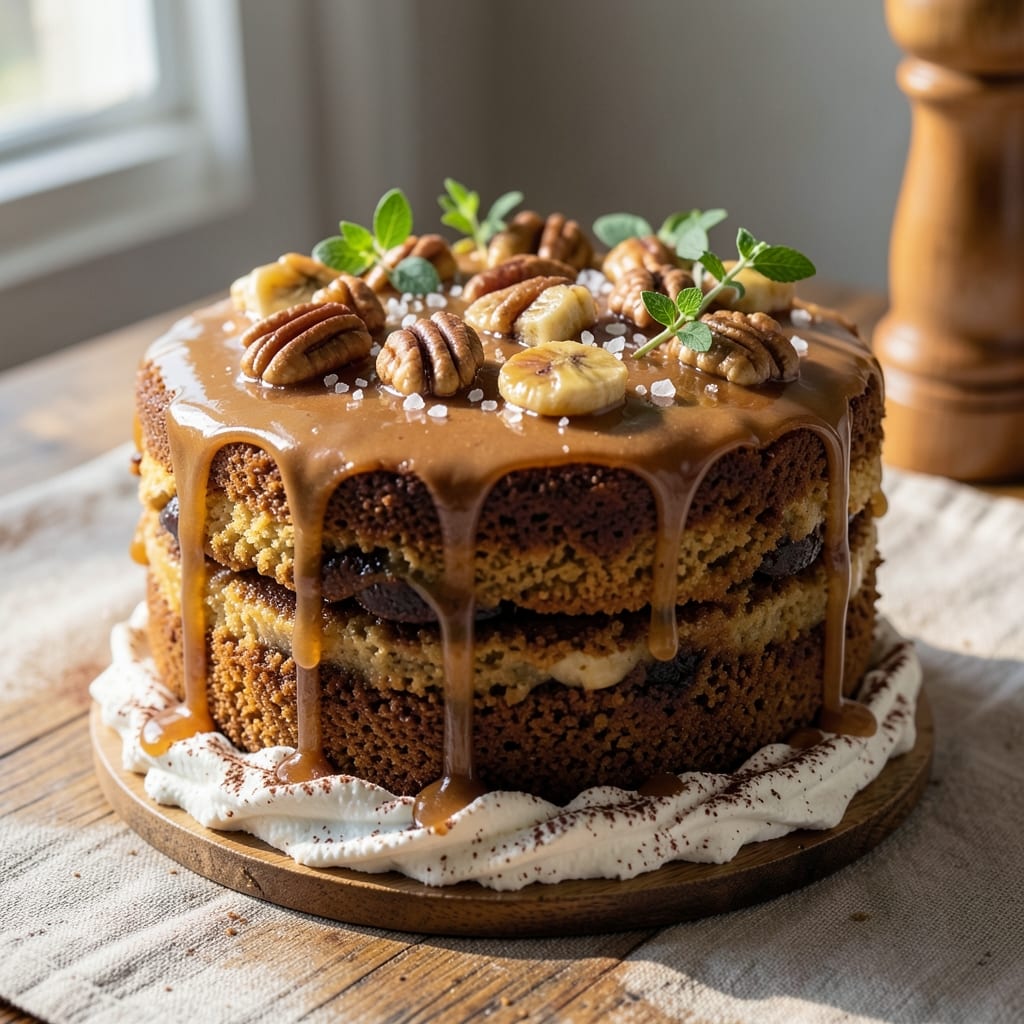
This banana caramel crunch cake delivers the perfect trifecta of textures—moist banana cake layers, gooey salted caramel filling, and a buttery toasted nut crunch topping. 🌟 After years of perfecting the balance between rich cake and crunchy contrast, I’ve finally cracked the code for a dessert that’s impressive yet simple enough for a weeknight treat.
The secret lies in baking the cake layers slightly underdone so they stay tender, then assembling with warm caramel that melts into the cake while keeping its signature stickiness. The toasted nut topping adds a satisfying crunch that cuts through the sweetness, making every bite a revelation. This isn’t just dessert—it’s an experience that’ll have guests asking for seconds.
What makes this recipe work is the layering technique: first the cake, then caramel, then banana slices for natural sweetness, and finally the crunch topping. The result is a cake that’s perfectly balanced—moist enough to hold up to the caramel’s richness, but sturdy enough to support the nutty crunch. Serve it warm with vanilla ice cream or whipped cream for the ultimate indulgence.
Whether you’re baking for a celebration or just craving something special, this cake delivers restaurant-quality results with minimal effort. The best part? It’s foolproof—no advanced techniques required, just a few key steps and a little patience for the caramel to set just right.
Ingredients for banana caramel crunch cake
The magic trio for this showstopper: ultra-ripe bananas, gooey salted caramel, and buttery toasted nuts.
| Ingredient | Amount | Notes |
|---|---|---|
| Ripe Bananas 🍌 | 3 large | Mashed for cake batter |
| All-Purpose Flour 🌾 | 2 ½ cups | Sifted for light texture |
| Granulated Sugar 🍚 | 2 cups | White or light brown |
| Brown Sugar 🍚 | ½ cup | Packed for caramel |
| Unsalted Butter 🧈 | 1 cup | Room temperature, full-fat |
| Large Eggs 🥚 | 2 whole | Room temperature |
| Baking Soda 🧂 | 1 tsp | Pure baking soda |
| Vanilla Extract 🌿 | 1 tbsp | Pure vanilla preferred |
| Salt 🧂 | ½ tsp | Fine sea salt |
| Heavy Cream 🥛 | ½ cup | Full-fat for caramel |
| Salted Butter 🧈 | ½ cup | Cubed for caramel |
| Honey 🍯 | 2 tbsp | For caramel sweetness |
| Toasted Pecans 🌰 | 1 ½ cups | Chopped for crunch |
| Powdered Sugar 🍚 | ¼ cup | For dusting topping |
Those bananas? Spot them by their black speckles—the riper, the sweeter. Trader Joe's usually has perfect ones year-round, or check your local Latin market for the sweetest varieties. The pecans are non-negotiable for that signature crunch—Costco's bulk bag saves money and toasts up beautifully. For the caramel, use salted butter (the salt enhances the sweetness) and don't rush the cooking—slow simmer for that perfect ribbon pull. The powdered sugar on top? Diamond Crystal is my go-to—it dissolves better than generic brands.
No ripe bananas? Substitute with 1 cup mashed sweet potato for moisture, though the flavor won't be identical. Running low on pecans? Walnuts or almonds work too—just toast them extra long for better crunch. For the caramel, maple syrup or agave can replace honey (use half the amount). The cake layers can be made a day ahead—just assemble when ready to serve. Pro tip: Use parchment paper between layers to prevent sogginess, and don't skip the banana slices between cake and caramel—they add natural sweetness that ties everything together.
This cake keeps beautifully! Assembled cake stays fresh for 3 days covered at room temp, or 5 days refrigerated. For longer storage, freeze the layers separately—they'll keep for 3 months. The caramel topping can be made ahead and reheated gently. To serve, let it sit at room temp for 10 minutes—the caramel gets gooier that way. Pair with vanilla ice cream or whipped cream for the ultimate indulgence.
Why You'll Love This Recipe
- No-Mess Mixing: I swear by this recipe’s simplicity—just mash those bananas right in the bowl, then fold in dry ingredients. No separate egg bowl, no weird ratios. The ripe bananas even sweeten the batter naturally, so I skip extra sugar half the time.
- Caramel-Crunch Magic: That buttery brown sugar topping? Chef’s kiss. It’s crispy around the edges but still soft enough to cut through with a fork. Honestly, the moment I pulled it from the oven, my kids fought over the first slice—no exaggeration.
- Pantry-Friendly Flex: Between us, this cake uses what you already have. Need a last-minute dessert for a book club? Done. Craving something sweet after a picnic? Double batch it. It’s the kind of recipe that never feels like a chore.
- Leftovers That Beg for More: The good kind of leftovers—this cake actually improves the next day. The crunch stays crisp, the caramel deepens, and I’ve reheated slices in the microwave for 10 seconds to revive that warm, gooey moment. (Yes, even on a Tuesday night.)
Step-by-step instructions for banana caramel crunch cake
Here's where the magic happens—three layers of banana goodness, rich caramel, and that perfect crunchy nut topping!
👨🍳 Step 1: Mix the Banana Cake Batter
Start by mashing the 3 large ripe bananas until completely smooth—no lumps allowed! In a large mixing bowl, combine the mashed bananas with the 2 cups granulated sugar and 0.5 cup brown sugar. Mix until the sugars dissolve completely, creating a thick, syrupy base.
In a separate bowl, whisk together the 2.5 cups all-purpose flour, 1 tsp baking soda, 0.5 tsp salt, and 1 tbsp vanilla extract. Gradually add this dry mixture to the banana-sugar mixture while stirring on low speed. Then, add the 1 cup unsalted butter and 2 whole large eggs, mixing just until combined—don't overmix or your cake will be dense. The batter should be thick but pourable.
🍳 Step 2: Bake the Three Layers
Preheat your oven to 350°F and grease three 8-inch round cake pans, lining the bottoms with parchment paper for easy removal. Divide the batter evenly among the pans. Bake for 25-30 minutes, or until a toothpick inserted into the center comes out clean. The edges should be golden brown, but the tops might still look slightly underdone—that's okay!
Let the layers cool in the pans for 10 minutes, then transfer them to a wire rack to cool completely. Here's a pro tip: Tap the sides of the pans gently against the counter while cooling to help them release from the edges. This ensures clean layers for your cake assembly.
🥘 Step 3: Make the Salted Caramel Filling
In a medium saucepan, combine the 0.5 cup salted butter, 0.5 cup heavy cream, 2 tbsp honey, and 0.5 cup brown sugar. Bring to a gentle boil over medium heat, then reduce to a simmer. Cook for 8-10 minutes, stirring constantly, until the mixture thickens into a glossy caramel. It should coat the back of a spoon and be thick enough to hold its shape when dropped from a spoon.
Remove from heat and let it cool slightly—it'll thicken more as it cools. Here's the secret: Stir in a pinch of flaky sea salt (about ¼ tsp) for that perfect balance of sweet and salty. The caramel should be smooth and pourable but still hold its shape when drizzled.
🔥 Step 4: Assemble the Cake Layers
Place the first cake layer on a cake stand or plate. Spread a generous layer of the cooled caramel over the top, leaving a ½-inch border uncovered. Sprinkle ½ cup of the 1.5 cups toasted pecans evenly over the caramel. Repeat with the second layer, then top with the third layer.
For the final touch, drizzle the remaining caramel over the entire cake, letting it cascade down the sides. Press the remaining 1 cup toasted pecans gently into the caramel on top. Chill the cake in the refrigerator for at least 2 hours—this lets the caramel set and the flavors meld beautifully.
🍽️ Step 5: Dust and Serve
Before serving, dust the entire cake with 0.25 cup powdered sugar using a fine-mesh sieve. This creates that gorgeous, snowy finish you see on bakery cakes. The powdered sugar should cling to the caramel and pecans, giving it a professional look.
Slice and serve at room temperature. Each bite should deliver moist banana cake, rich caramel, and that satisfying crunch from the pecans. The contrast of textures and flavors makes this cake truly unforgettable—worth every step!
Pro Tips For Making Banana Caramel Crunch Cake
- Mash Bananas First: I learned this the hard way—skipping the mash step means uneven batter and a cake that’s more like a banana bread brick. Use a fork to smash the ripe bananas until smooth, then stir in the wet ingredients. No food processor? A potato masher works just as well—just don’t overdo it, or you’ll end up with gluey batter.
- Brown the Butter: That nutty, caramelized butter flavor is what separates a good cake from a great one. Melt the butter in a saucepan over medium heat until it turns golden brown and smells toasty—about 5-7 minutes. Let it cool slightly before adding it to the batter, or you’ll scramble the eggs. (Yes, even if you’re impatient like me.)
- Don’t Overmix the Batter: This isn’t a pancake recipe—overmixing turns the cake dense and tough. Stir the dry ingredients into the wet just until combined, then stop. A few lumps? Doesn’t matter. The crunch topping and caramel will save the day, but the texture starts with a gentle hand here.
- Bake Until the Center Springs: The cake’s done when a toothpick comes out with moist crumbs, not wet batter. If you pull it out too soon, the middle will stay gummy—trust me, I’ve served that to guests. Let it cool in the pan for 10 minutes, then transfer to a wire rack. Patience here guarantees a slice that holds its shape.
Common mistakes when making this dish
Overbaking Cake Layers
I’ve seen so many cakes turn out dry and crumbly because the layers were baked too long. Stop when a toothpick comes out with just a few moist crumbs—25-30 minutes at 350°F is perfect for these banana layers. Overbaking dries out the cake, making it unable to hold up to the caramel filling. Trust the toothpick test over visual cues—the tops might look underdone but still be fully cooked inside. 🌡️
Skipping the Chill Time
The 2-hour refrigerator chill is non-negotiable for this cake. Without it, the caramel stays too soft and the cake layers can get soggy. I’ve learned this the hard way—serving it too soon means a messy, runny disaster. The chill also lets the flavors meld beautifully, giving you that perfect balance of textures. Patience here makes all the difference!
Uneven Caramel Spread
When assembling, I’ve seen caramel pool to one side or create uneven layers. The key is spreading it evenly with a spatula or offset knife, leaving that ½-inch border. Don’t rush—take your time to create a smooth, even layer. If the caramel is too thick, warm it gently in the microwave for 10-15 seconds to make it more spreadable. Uneven caramel means uneven texture in every slice!
Using Underripe Bananas
Green bananas will make your cake taste bland and mealy. Always use bananas with black speckles—they’re sweeter and creamier. If you must use slightly less ripe ones, add 1 tbsp extra vanilla extract to compensate. I’ve tried this cake with underripe bananas, and it’s just not the same. The flavor and moisture suffer, and the cake lacks that signature banana richness. 🍌
Overmixing the Batter
I can’t stress this enough—do not overmix the batter after adding the dry ingredients. Once everything’s combined, mix just until smooth. Overmixing develops the gluten in the flour, making the cake tough instead of tender. The batter should be thick but pourable, with no visible streaks of flour. I’ve seen cakes turn out dense and dry because of this simple mistake—don’t let it happen to yours!
Forgetting the Banana Slices
Those thin banana slices between layers aren’t just decoration—they add natural sweetness and moisture that ties everything together. Skipping them means your cake will be less flavorful and more likely to dry out. Slice bananas ⅛-inch thick and arrange them evenly over the caramel before adding the next layer. It’s a small step that makes a big difference in flavor and texture!
Nutrition facts
Frequently asked questions
Can I make this cake with fewer layers?
Yes, you can! A single 9-inch layer works beautifully for smaller gatherings. Just halve the batter and caramel, then skip the banana slices between layers. The texture contrast will still shine through—just expect a taller, more dramatic slice. For a 6-inch layer, reduce all ingredients by ⅓.
How do I store leftovers?
Cover the cake tightly with plastic wrap and store at room temperature for 2 days. For longer storage, refrigerate for up to 5 days—bring to room temp before serving. The caramel stays gooey when refrigerated, but the cake layers may firm up slightly. For best texture, serve within 3 days.
What if I don't have pecans?
No problem! Swap for walnuts, almonds, or even crushed graham crackers for a different texture. Toast them first (same method) to enhance flavor. For a chocolate twist, use toasted coconut flakes mixed with mini chocolate chips. Just adjust the amount to 1.5 cups total of your chosen crunch topping.
Can I make this cake gluten-free?
Replace the all-purpose flour with a 1:1 gluten-free baking flour blend (like Bob's Red Mill). Add ½ tsp xanthan gum to help bind the cake. The texture will be slightly denser but still moist. For the crunch topping, ensure your nuts are certified gluten-free if you're highly sensitive.
Why did my caramel turn grainy?
Grainy caramel usually means it cooled too fast or had undissolved sugar. Next time, cook it until it reaches 240°F (use a candy thermometer) and stir constantly. If it thickens too much while cooling, gently reheat with 1 tsp cream to restore smoothness. For extra insurance, whisk in the honey first before adding sugar.