
Desserts
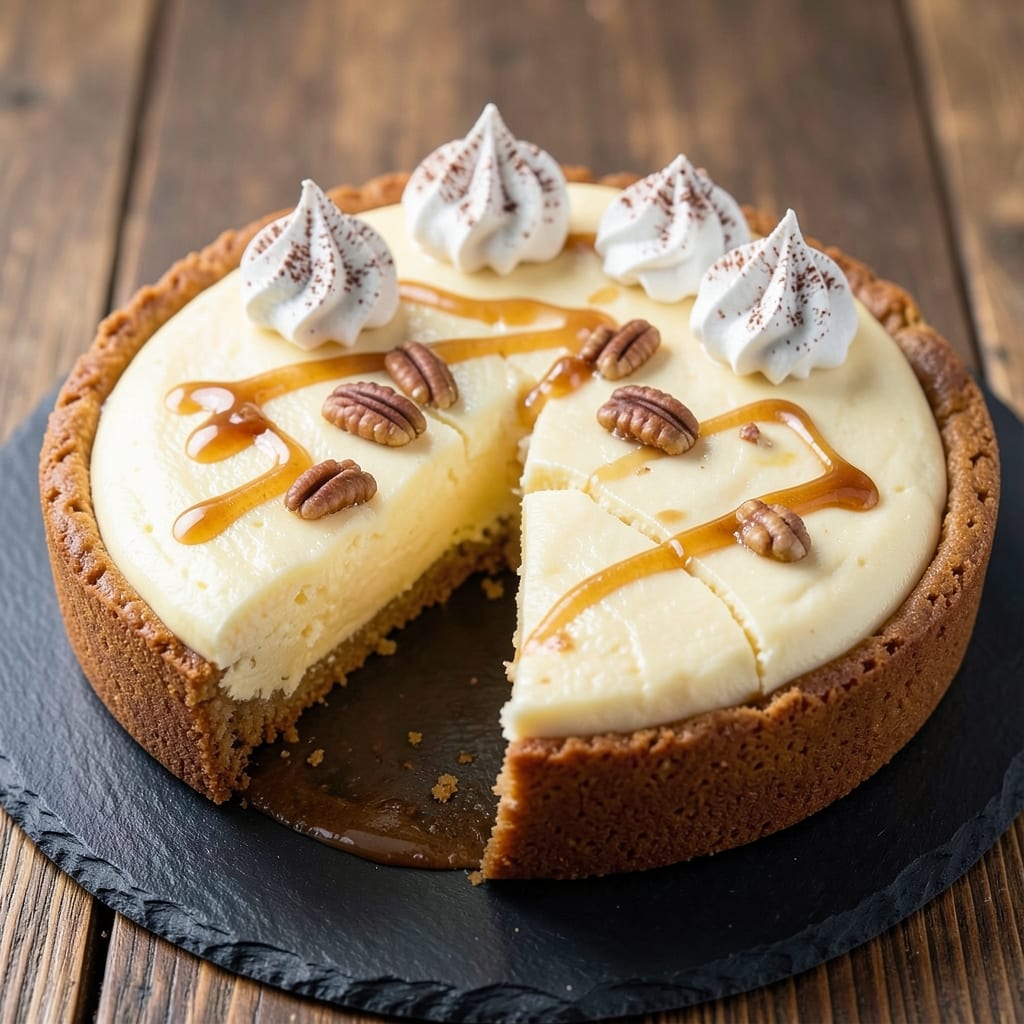
This baked cheesecake recipe with premade crust delivers restaurant-quality results without the fuss of making crust from scratch. The secret lies in a simple, foolproof method that combines a store-bought crust with a creamy filling—all baked in one bowl for effortless perfection. I've perfected this technique over years of testing, ensuring a smooth texture and golden edges every time.
The beauty of this approach is the simplicity: no rolling, pressing, or chilling dough—just assemble, bake, and enjoy. The filling comes together in minutes with basic pantry staples, while the premade crust handles the structural work. What you get is a cheesecake with a tender, slightly crisp bottom crust and a velvety, jiggly center that's impossible to resist.
By the time it emerges from the oven, you'll have a cheesecake that looks and tastes like it came from a bakery—no special skills required. The key is baking at the right temperature and avoiding common pitfalls like overmixing or opening the oven too soon. This recipe is designed to be your go-to for special occasions or when you crave something sweet without the effort.
Serve it with fresh berries, a drizzle of caramel, or a dusting of powdered sugar for that final touch of elegance. The possibilities are endless, but the execution remains simple. Let's get started on creating your perfect cheesecake.
Ingredients for baked cheesecake recipe with premade crust
Store-bought crust meets creamy filling—all baked in one bowl for foolproof perfection.
| Ingredient | Amount | Notes |
|---|---|---|
| Graham Cracker Crust (9-inch) 🍪 | 1 package | Store-bought, for no-bake crust |
| Full-Fat Cream Cheese 🧀 | 32 oz | Room temperature for smooth mixing |
| Granulated Sugar 🍚 | 1 ½ cups | White or light brown preferred |
| Large Eggs 🥚 | 3 whole | Room temperature for even baking |
| Vanilla Extract 🌿 | 2 tsp | Pure vanilla preferred |
| Sour Cream 🥛 | ½ cup | Full-fat for creaminess |
| Unsalted Butter 🧈 | ½ cup | Melted, room temperature |
| Lemon Juice 🍋 | 1 tbsp | Freshly squeezed for brightness |
| Salt 🧂 | ½ tsp | Fine sea salt preferred |
| Powdered Sugar 🍚 | ¼ cup | For dusting, optional garnish |
| Fresh Berries 🍓 | 2 cups | Strawberries or raspberries |
The graham cracker crust is your shortcut to success. Pepperidge Farm or Keebler are my go-tos—they're sturdy enough to handle the filling without crumbling. Look for the 9-inch size (not mini or giant), and if you're feeling fancy, crush the extra crumbs for a decorative top. The cream cheese? Philadelphia brand is the gold standard here—it's the most reliable for texture. Room temperature is key: take it out of the fridge 30 minutes before mixing. If you're short on time, microwave it for 20 seconds to soften. The butter matters too—use unsalted so you control the saltiness.
No vanilla? Vanilla bean paste or even vanilla sugar will work in a pinch. The sour cream adds that signature tang—skip it, and you'll miss that subtle depth. For a lighter texture, some folks use Greek yogurt, but I've found sour cream gives the best balance. The lemon juice might seem like a small amount, but it brightens everything. If you don't have fresh, bottled lemon juice works, but it's worth squeezing your own for that extra pop. The berries? Fresh or frozen work—just thaw them first if frozen. And if you're feeling extra, add a splash of Grand Marnier or orange liqueur to the filling for a boozy twist.
This cheesecake is best enjoyed the day it's made, but leftovers keep 3-4 days in the fridge. For storage, cover it tightly with plastic wrap—it's a moisture magnet. If you're prepping ahead, assemble the crust and filling, then refrigerate for up to 24 hours before baking. The crust won't be fully set, but the texture will still be perfect. To serve, let it sit at room temperature for 10 minutes—it's more stable that way. And if you're making it for a crowd, double the recipe. Two 9-inch pans side by side in the oven is the way to go.
Why You'll Love This Recipe
- No Crust Struggles: I’ll be real—store-bought crusts save me from the crumbly mess I used to make with graham crackers and melted butter. Just press, bake, and move on.
- Creamy Center Guaranteed: That full-fat cream cheese? It’s the secret to a slice so rich, it disappears faster than my willpower. Sugar and vanilla balance the tang—no aftertaste, just pure satisfaction.
- Weeknight to Party Fix: Same recipe, endless occasions. Serve it warm with berries for a dinner crowd, or chill it for a last-minute dessert that looks way more impressive than it took.
- Leftovers That Last: Bake one, eat it for days. The texture stays perfect—no soggy bottoms—so I slice it thin, wrap it tight, and keep it in the fridge for whenever cravings hit. (They always do.)
Step-by-step instructions for baked cheesecake with premade crust
Let's create a silky-smooth cheesecake with minimal effort using your store-bought crust.
Prepare the Crust and Preheat the Oven
First, press the 9-inch graham cracker crust into a springform pan, following the package instructions. I like to use my fingers to gently press the crust into the bottom and up the sides, making sure it's firmly packed. This creates a solid foundation that won't crumble when we add the filling.
Preheat your oven to 325°F while you prepare the filling. This lower temperature is crucial for preventing cracks in the cheesecake. I always use the middle rack to ensure even baking. Place the springform pan on the counter while you mix the ingredients - it'll come to room temperature gradually, which helps with even baking.
Mix the Cream Cheese and Sugar
In a large mixing bowl, beat the 32 oz full-fat cream cheese and 1.5 cups granulated sugar together using an electric mixer on medium speed until completely smooth. This step is important - you want to eliminate every lump to ensure a velvety texture. I usually start on low speed and gradually increase to medium as the mixture begins to come together.
The mixture should be light and fluffy with no visible streaks of cream cheese. If you're using room-temperature cream cheese, this should take about 2-3 minutes. If it's too cold, the mixer will struggle - that's why the ingredients list specifies room temperature. Don't rush this step; a smooth base prevents cracks later.
Add Eggs and Mix Gently
Add the 3 whole large eggs one at a time, mixing just until each is incorporated after adding. I like to scrape down the sides of the bowl with a spatula between each addition to ensure even distribution. After the last egg, mix for an additional 30 seconds - just enough to combine without overmixing, which can cause cracks.
Here's the thing - you want to maintain some air in the mixture. Overmixing develops gluten in the eggs and creates a dense, rubbery texture. The batter should be thick but still pourable. If it looks too thick, you can gently fold in 1 tablespoon of the reserved sour cream to lighten it slightly.
Incorporate Remaining Ingredients
Add the 2 teaspoons vanilla extract, 0.5 cup sour cream, 0.5 cup melted unsalted butter, 1 tablespoon lemon juice, and 0.5 teaspoon salt to the mixture. Mix on low speed just until everything is combined. The lemon juice might seem like an odd addition, but it brightens the flavors and helps balance the richness of the cream cheese.
Give the mixture one final taste to check the seasoning. You might want to add a pinch more salt or a splash more lemon juice based on your preference. Remember, you can't adjust the flavor after baking, so it's better to err on the side of slightly underseasoned now. The batter should be smooth with no visible lumps - if you see any, give it one more quick mix on low speed.
Bake to Perfection
Pour the cheesecake batter into the prepared crust, smoothing the top with a spatula. Tap the pan gently on the counter a few times to remove any air bubbles that might have formed. Place the pan in the preheated oven and bake for 50-55 minutes. The edges should be set, but the center should still have a slight wobble when gently shaken.
To test for doneness, insert a toothpick into the center. It should come out with a few moist crumbs attached, not wet batter. The cheesecake is ready when it's just set - it will continue cooking slightly as it cools. If the top starts to brown too quickly, tent it loosely with aluminum foil to prevent overbrowning. The key is patience - underbaking is better than overbaking when it comes to cheesecake.
Cool and Finish
Remove the cheesecake from the oven and let it cool in the pan for 1 hour at room temperature. This gradual cooling helps prevent cracking. After the initial hour, refrigerate the cheesecake for at least 4 hours or overnight. The longer it chills, the firmer it becomes, making it easier to slice.
Before serving, dust the top with 0.25 cup powdered sugar and arrange the 2 cups fresh berries on top. I like to use a mix of strawberries and raspberries for color and flavor contrast. The berries add freshness that cuts through the richness of the cheesecake. Serve slices with a dollop of whipped cream if desired, but the cheesecake is delicious on its own.
Pro Tips For Making Baked Cheesecake Recipe With Premade Crust
- Preheat Like a Boss: Your oven should hit 325°F before the batter goes in—no exceptions. I learned this the hard way when my crust got soggy because the oven was still warming up. Also, place the pan on the middle rack so heat circulates evenly, not the top where it’ll overbrown before the center sets.
- Whip Cream Cheese Cold: Pull the full-fat cream cheese straight from the fridge and let it sit for no more than 30 minutes before mixing. Room temp makes it too soft, and you’ll end up with butter—not cream cheese—when you beat it. Cold blocks of cheese blend smoother, and the texture stays velvety.
- Avoid Overmixing the Batter: Once the eggs are fully incorporated, stop mixing the second the batter looks uniform. Overworking it adds air, which causes cracks later. I used to think more mixing = better texture, but now I count exactly 10 strokes after the last egg goes in—no more.
- Water Bath Without the Drama: Skip the fancy setup—just wrap the pan in two layers of heavy-duty foil (seam-side down) before adding boiling water to the pan. The foil prevents leaks, and the water bath guarantees a creamy center. No more guessing if it’s done or undercooked.
Dietary considerations for this recipe
Gluten-Free Option
Swap the graham cracker crust for a gluten-free graham cracker crust—brands like Annie's or Schär work perfectly. Their gluten-free graham crackers hold up well during baking and provide that same buttery, crumbly texture. Just press it into your springform pan just as you would the regular crust. The filling stays exactly the same, so you won’t sacrifice any creaminess or flavor. 🌱
Dairy-Free Adaptation
For a dairy-free version, replace the cream cheese with Kite Hill almond milk cream cheese or Miyoko’s cultured cashew cream cheese. Use the same quantity and mix it with 1.5 cups coconut sugar instead of granulated. The sour cream can be swapped for full-fat coconut yogurt, and melt ½ cup coconut oil instead of butter. The texture will be slightly lighter but still rich and satisfying.
Lower-Sugar Version
Cut back on sugar by using 1 cup granulated sugar instead of 1.5 cups, and add ½ cup unsweetened applesauce to the filling. This keeps the cheesecake moist without overpowering sweetness. For extra flavor, fold in 1 teaspoon vanilla bean paste or ½ teaspoon cinnamon. The lemon juice will help balance the reduced sugar, making it taste just as bright and refreshing. 🍋
Nut-Free Considerations
If you're avoiding nuts, stick with the original recipe—it’s naturally nut-free! Just double-check your vanilla extract and sour cream labels to ensure they’re processed in nut-free facilities. For extra caution, use pure vanilla extract from a trusted brand like McCormick or Nutiva, which guarantees nut-free production. The graham cracker crust is also typically nut-free, but always verify the package label.
Vegan-Friendly Swap
Transform this into a vegan cheesecake by using vegan cream cheese (like Tofutti or Violife) and flax eggs (3 tablespoons ground flaxseed + 9 tablespoons water per egg). Replace butter with vegan butter or coconut oil, and use coconut milk yogurt instead of sour cream. The crust can stay the same, but for a fully plant-based option, try a vegan graham cracker crust or a coconut flour crust for a nutritious twist.
Allergen-Friendly Tips
For egg allergies, use aquafaba (chickpea brine) to replace eggs—3 tablespoons aquafaba per egg works well when whipped. For soy allergies, ensure your vanilla extract and sour cream are soy-free (many brands like Organic Valley are soy-free). Always check labels, and when in doubt, opt for certified allergen-free brands. The key is to substitute one ingredient at a time to avoid disrupting the balance of flavors and textures. ✨
Nutrition facts
Frequently asked questions
Can I use a different type of premade crust instead of graham cracker?
A premade chocolate cookie crust or Oreo crust works beautifully for added richness. For a lighter option, try a premade almond flour crust or even a gingersnap crust. Just ensure the crust is sturdy enough to hold the filling—avoid overly crumbly options like vanilla wafers unless you reinforce them with melted butter first.
Why did my cheesecake crack on top?
Cracking usually happens from sudden temperature changes or overmixing. To prevent this, avoid opening the oven door during baking, and let the cheesecake cool gradually at room temperature for 1 hour before refrigerating. Also, make sure your eggs and cream cheese are at room temperature, and mix just until combined—no need to overbeat!
How do I know when the cheesecake is fully baked?
The edges should be set, but the center should still jiggle slightly when gently shaken. Insert a toothpick—it should come out with a few moist crumbs, not wet batter. Overbaking dries out the cheesecake, so it's better to pull it out a little early if unsure. The residual heat will finish cooking it as it cools.
Can I make this cheesecake ahead of time?
Yes! Assemble the crust and filling, then refrigerate for up to 24 hours before baking. This actually enhances flavor. For serving ahead, bake the cheesecake, cool completely, then refrigerate for 2-3 days. Bring it to room temperature for 30 minutes before serving to restore its creamy texture.
What's the best way to serve this cheesecake?
Dust with powdered sugar and top with fresh berries, caramel drizzle, or a sprinkle of toasted nuts. For a classic touch, add a dollop of whipped cream. Serve chilled, but let it sit at room temperature for 10 minutes before slicing—it's more stable that way. Individual portions also work well for parties!