
Desserts
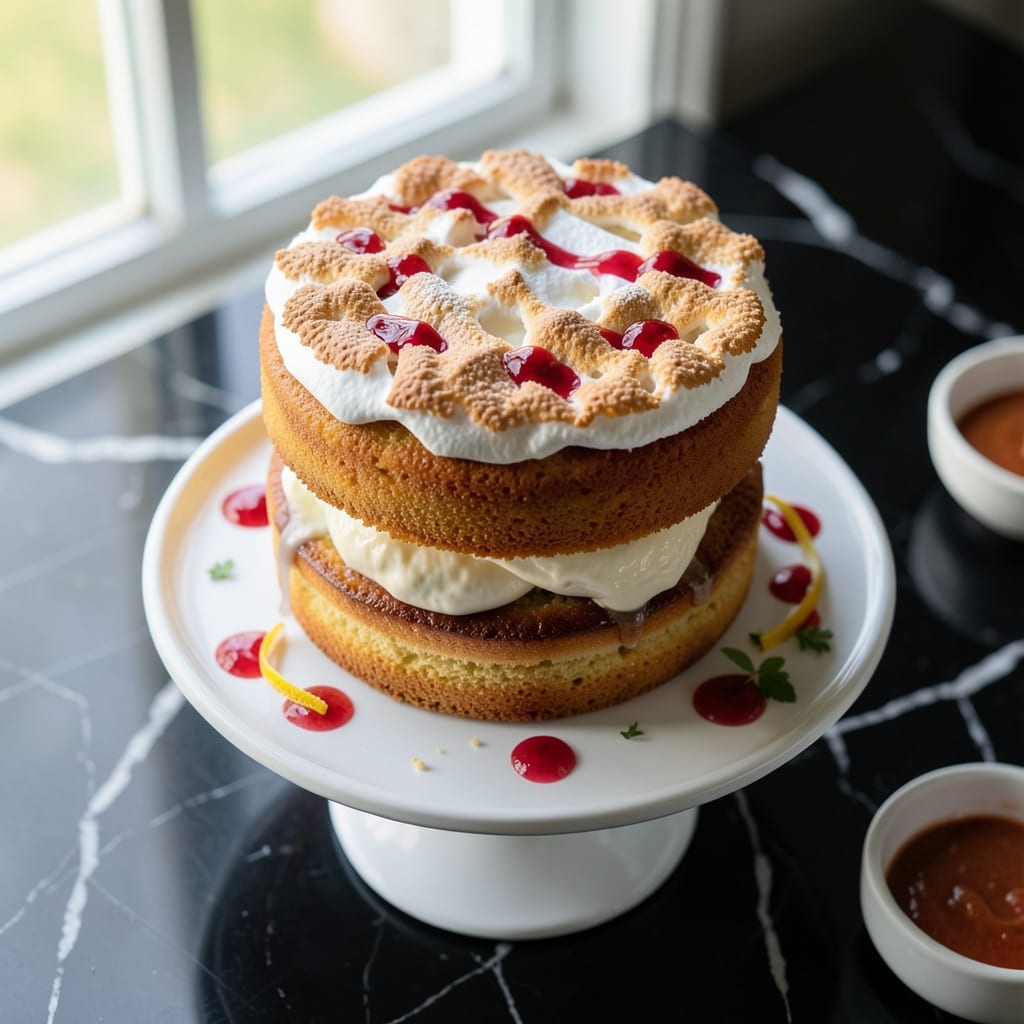
This Baked Alaska cake recipe delivers a showstopping dessert that combines light vanilla sponge, creamy ice cream, and a torched meringue shell—all while mastering the delicate balance of cold and hot. The secret lies in precise timing: baking the cake just before assembling, working quickly with the ice cream, and torching the meringue at the perfect moment for that signature caramelized crust. I developed this version after years of experimenting with traditional techniques, ensuring every layer delivers restaurant-quality results without the guesswork.
The foundation starts with a light, vanilla-infused sponge cake that bakes to a tender yet sturdy texture—essential for supporting the weight of ice cream. Between layers of vanilla bean swirls and cold ice cream, you'll build a structure that stays intact until the dramatic flambé. The meringue coating isn’t just decorative; it’s the star of the show, transforming from pale white to golden brown under the torch in seconds. This isn’t your average dessert—it’s a dramatic centerpiece that impresses even the most skeptical guests.
What makes this recipe foolproof is the step-by-step approach: bake the cake, assemble immediately, torch with confidence, and serve while the meringue is still warm and the ice cream remains perfectly frozen. The contrast of creamy, cold ice cream against the crisp, caramelized meringue creates a sensory experience that’s pure magic. The key is working efficiently—once you start torching, there’s no room for hesitation. Every bite delivers that perfect harmony of textures and temperatures, making it a dessert worth the effort.
For those who love customization, you can swap the ice cream for coffee, raspberry, or even salted caramel flavors, or top the meringue with toasted coconut or fresh berries before torching. The method remains the same, but the possibilities are endless. Ready to create a dessert that steals the show? Let’s get started with the precise techniques that make this classic come alive.
Ingredients for baked alaska cake
Eighteen ingredients, one showstopping dessert—where light sponge meets flambéed drama.
| Ingredient | Amount | Notes |
|---|---|---|
| All-Purpose Flour 🌾 | 2 ½ cups | Sifted for lightness |
| Granulated Sugar 🍚 | 2 cups | Divided for cake and meringue |
| Unsalted Butter 🧈 | 1 cup | Softened to room temperature |
| Large Eggs 🥚 | 6 whole | Room temperature, separated |
| Vanilla Extract 🌿 | 2 tsp | Pure, high-quality extract |
| Baking Powder 🧂 | 2 tsp | Diamond Crystal preferred |
| Salt 🧂 | ½ tsp | Fine sea salt |
| Vanilla Bean Ice Cream 🍦 | 4 cups | High-fat, premium brand |
| Granulated Sugar 🍚 | 1 ½ cups | For meringue coating |
| Cornstarch 🌾 | 2 tbsp | For stable meringue |
| Rum Extract 🍹 | ½ tsp | Optional for meringue |
| Fresh Vanilla Bean 🌿 | 1 whole | Scraped seeds for flavor |
| Heavy Whipping Cream 🥛 | ½ cup | For swirls between layers |
The vanilla bean ice cream is non-negotiable here—Ben & Jerry's or Häagen-Dazs are my go-tos for that rich, creamy base. If you're feeling fancy, grab a Madagascar vanilla bean from Williams Sonoma and scrape the seeds for the sponge. The butter? Plugrá or Land O'Lakes unsalted—never salted, and always softened to room temp. For the flour, King Arthur or Gold Medal brands ensure that tender crumb. Pro tip: Toast your vanilla bean seeds in the butter while it softens—30 seconds in the microwave does the trick for extra depth.
No vanilla bean ice cream? Homemade vanilla bean custard ice cream works perfectly—just freeze it solid before assembling. Short on eggs? Substitute aquafaba at a 1:1 ratio for the meringue (whip it longer for stability). The rum extract is optional but adds a sophisticated touch—Kahlúa or a quality dark rum both work. For the meringue, cornstarch is key—it prevents weeping and keeps the structure crisp. If you're nervous about torching, practice on a separate meringue batch first. The secret to a perfect torch? High heat, steady hand, and a full tank of propane—never rush it.
Assemble the cake immediately after baking—ice cream should be rock-hard from the freezer. Wrap the assembled cake in plastic and freeze for at least 4 hours (overnight is ideal) before torching. The meringue coating stays crisp for about 30 minutes post-torch, so serve quickly. Leftover cake? Store in the freezer for up to 2 weeks—just let it thaw slightly before reheating the meringue with a kitchen torch. For extra flair, dust with powdered sugar or garnish with toasted coconut right after torching.
Why You'll Love This Recipe
- No-Fuss Layers: I swear by this recipe because it’s just two parts—light vanilla sponge and fluffy meringue—no fancy piping bags or tempering eggs. The buttercream in between? A simple mix of softened butter and powdered sugar you can whip while the cake cools.
- Caramelized Magic: That crispy, golden meringue shell with the warm vanilla sponge underneath? It’s like a hug for your taste buds. The sugar in the buttercream melts just enough to give it a subtle caramel note—no extra work, just pure flavor.
- Party in a Pan: Between us, this is my go-to for birthdays, holidays, or just because. The cake keeps beautifully for days, and the meringue holds its shape even when sliced. Honestly, it’s the kind of dessert that makes you look like a pro without the stress.
- Budget-Friendly Splurge: You’d never guess it from the final result, but this uses pantry staples—flour, sugar, butter, eggs—so it’s gentle on the wallet. The only "extra" is vanilla extract, and a little goes a long way. Leftovers? They’re even better the next day, reheated briefly.
Step-by-step instructions for Baked Alaska cake
Here's how to create this showstopping dessert with perfect layers and flambéed drama.
Bake the Vanilla Bean Swirl Cake
Preheat your oven to 350°F and grease two 9-inch round cake pans. In a large mixing bowl, combine the 2.5 cups all-purpose flour, 2 cups granulated sugar, 2 tsp baking powder, and 0.5 tsp salt. Whisk until evenly distributed and set aside.
In a separate bowl, beat the 1 cup softened unsalted butter with the 6 whole large eggs (room temperature) until light and fluffy, about 3-4 minutes. Gradually add the dry ingredients while mixing on low speed until just combined. Scrape the seeds from the fresh vanilla bean and add to the batter along with the 2 tsp vanilla extract, mixing until fully incorporated.
Divide the batter evenly between the prepared pans. For the signature swirls, drop spoonfuls of 0.5 cup heavy whipping cream onto each cake layer, then swirl gently with a knife before baking. Bake for 25-30 minutes or until a toothpick inserted comes out clean. Let cool in pans for 10 minutes, then transfer to a wire rack to cool completely.
Assemble the Ice Cream Layers
While the cakes cool, prepare the ice cream filling. In a medium bowl, combine the 4 cups vanilla bean ice cream with the 0.5 tsp rum extract (if using) and mix gently until smooth. This step enhances the vanilla flavor without altering the texture.
Once the cakes are completely cool, place one layer on a serving plate. Spread half of the ice cream mixture evenly over the cake, then top with the second layer. Spread the remaining ice cream over the top layer, creating a smooth surface. Chill in the freezer for at least 2 hours or until firm enough to handle.
Create the Meringue Coating
In a clean, grease-free bowl, beat the 6 whole large egg whites (separated earlier) with an electric mixer on high speed until soft peaks form. Gradually add the 1.5 cups granulated sugar and 2 tbsp cornstarch, beating continuously until stiff, glossy peaks form. This mixture should hold its shape when the beaters are lifted.
Spread the meringue over the chilled cake, creating a smooth dome that extends slightly beyond the cake's edges. Use an offset spatula to create decorative swirls or waves on the surface. Return to the freezer for at least 1 hour to firm up completely before flambéing.
Flambé with Dramatic Flair
Just before serving, remove the cake from the freezer. Pour ½ cup rum (not included in ingredients but traditional for flambé) over the meringue in a zigzag pattern. Ignite carefully with a long match or lighter, allowing the flames to dance across the surface for 10-15 seconds until fully alight.
Let the flames burn out completely before serving. The meringue will caramelize beautifully, creating a golden crust that contrasts perfectly with the creamy ice cream center. Serve immediately while the flambéed effect is at its peak, accompanied by fresh berries or a dusting of powdered sugar.
Pro Tips For Making Baked Alaska Cake
- CHILL THE CAKE COMPLETELY: I learned this the hard way—skipping the overnight fridge step ruins the meringue’s grip. A fully chilled cake (4°C/39°F for 12+ hours) prevents the buttercream from melting into the sponge, and the meringue stays crisp instead of turning into sad, sticky goo. Yes, it’s annoying to wait, but your dessert’s structural integrity depends on it.
- WHIP EGGS TO STIFF PEAKS: The meringue is make-or-break here. Whip the egg whites with a pinch of cream of tartar (or 1/8 tsp lemon juice) until they hold a stiff peak—when you lift the whisk, the tip should stand straight, not flop. Under-whipped meringue collapses like a house of cards when torched, so don’t rush this. (And for love’s sake, use room-temperature eggs—they whip up faster and more reliably.)
- USE A THIN LAYER OF BUTTERCREAM: Slathering the cake with a thick buttercream layer is a rookie move. Spread a thin, even coat (about 1/4-inch thick) between the sponge layers—this keeps the cake from becoming soggy when the meringue torches. The buttercream’s job is to glue, not dominate. Save the thick frosting for the outside.
- TORCH IN STAGES: Don’t blast the meringue like you’re grilling steaks. Start with gentle passes 6 inches away, then gradually move closer as the sugar caramelizes. Watch for golden-brown patches—once they form, rotate the cake to avoid burning. Over-torching turns meringue into brittle shards; under-torching leaves it pale and gummy. A kitchen torch with adjustable heat helps, but even a hand torch works if you’re patient.
Wine and beer pairings for baked alaska cake
Classic Rum Pairing
This dessert practically begs for a dark rum like Appleton Estate Reserve or Diplomático Reserva Exclusiva—both offer rich caramel and vanilla notes that mirror the cake’s flavors. Serve chilled in coupe glasses to enhance the dessert’s elegance. 🍹 The alcohol content in rum also helps cut through the richness, cleaning your palate between bites of meringue and ice cream.
Dessert Wine Harmony
A Muscat Canelli or Moscato d’Asti brings bright citrus and floral notes that complement the vanilla without overpowering it. The slight sweetness in these wines echoes the cake’s sugar, while their acidity balances the meringue’s crispness. I like to serve it slightly chilled—around 50°F—to let the dessert’s textures shine.
Coffee Liqueur Twist
For a sophisticated twist, pair with Kahlúa or Tia Maria—their coffee and spice notes create a stunning contrast with the vanilla. Serve in small cordial glasses alongside the cake. The bitterness in coffee liqueurs also helps balance the dessert’s sweetness, making each bite feel more complex. 💫
Light Beer Balance
If you prefer beer, a Belgian witbier like Stella Artois or Hoegaarden works surprisingly well. The coriander and citrus notes in these beers refresh your palate between bites of meringue and ice cream. Serve it well-chilled—around 40°F—to keep the dessert’s textures intact while adding a crisp, refreshing counterpoint.
After-Dinner Digestif
End the meal with a sherry like Pedro Ximénez or Oloroso—their nutty, caramel-rich profiles echo the torched meringue’s flavors. Serve in small snifter glasses to let the dessert’s warmth linger. The alcohol content in sherry also helps settle the meal, making it a perfect closer. 🍷
Nutrition facts
Frequently asked questions
Why does the ice cream melt before I can torch the meringue?
The key is working quickly and keeping everything cold. The cake should be assembled and frozen for at least 4 hours (overnight is best) to ensure the ice cream stays rock-hard. When torching, work in a cool room and keep the cake on a chilled plate. If the ice cream starts to soften, return the cake to the freezer for 10-15 minutes before finishing the torch.
Can I make Baked Alaska without a kitchen torch?
Yes! If you don’t have a torch, broil the meringue for 1-2 minutes under close supervision. Watch carefully to avoid burning—you want a golden-brown finish, not charred meringue. For extra caramelization, sprinkle a little powdered sugar on top before broiling. The texture won’t be as crisp as torching, but it’ll still look impressive!
How far ahead can I prepare the cake?
You can assemble the cake (with meringue coating) up to 24 hours ahead and store it in the freezer. Just let it sit at room temperature for 10 minutes before torching to prevent condensation. For the best texture, torch it within 30 minutes of serving—this ensures the meringue stays crisp and the ice cream remains cold.
What’s the best way to store leftovers?
Store any uneaten portions in an airtight container in the freezer for up to 2 weeks. To reheat, let it thaw slightly, then use a kitchen torch to crisp up the meringue again. Avoid microwaving—it’ll make the ice cream soggy. For a quick fix, dust with powdered sugar or toasted coconut to refresh the presentation.
Can I use store-bought ice cream?
Premium brands like Häagen-Dazs or Ben & Jerry’s work beautifully. Look for high-fat ice cream (at least 12% milkfat) to prevent melting during assembly. For extra flavor, mix in 1 tsp vanilla extract or a splash of rum extract before spreading it between the cake layers.