
Desserts
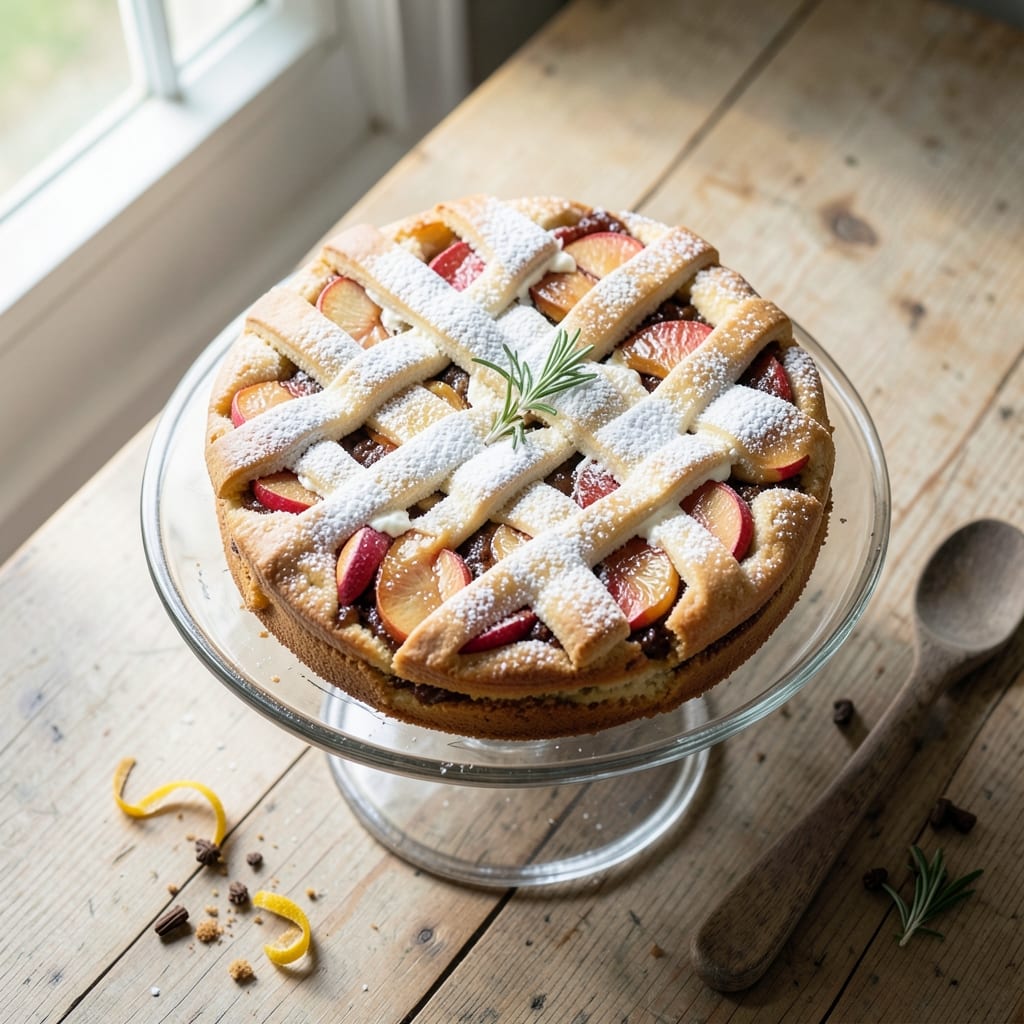
This apple scone cake recipe delivers the perfect balance of tender crumb, buttery layers, and caramelized apple streaks that taste like autumn in every bite. The secret lies in combining classic scone texture with moist cake layers, all topped with a crumbly streusel that encases the spiced apple filling. I developed this recipe after years of experimenting with apple desserts—this version finally captures that restaurant-quality texture and flavor at home.
The magic happens in the layers: a rich, buttery cake base infused with cinnamon and nutmeg, separated by a spiced apple compote that keeps the filling moist and flavorful. Baking the cake in two layers ensures each slice has that signature scone-like crunch while maintaining a tender center. The caramelized apple streaks add visual appeal and a burst of sweet-tart flavor that makes this dessert irresistible.
What you'll end up with is a showstopping dessert that's perfect for holidays, brunch gatherings, or anytime you crave something warm and comforting. The combination of buttery layers, spiced apples, and crumbly topping creates a texture that's both rustic and elegant. Serve it warm with a dollop of whipped cream or a drizzle of caramel for the ultimate indulgence.
This recipe scales beautifully for parties and keeps well for up to 3 days in an airtight container. The versatility of the filling means you can swap in different fruits like pear or berries if apples aren't in season. Here's how to make it!
Ingredients for apple scone cake
Buttery layers, spiced apples, and crumbly streusel—this is your fall dessert dream come true.
| Ingredient | Amount | Notes |
|---|---|---|
| All-Purpose Flour 🌾 | 3 cups | Sifted for light texture |
| Granulated Sugar 🍚 | 1 ½ cups | White or light brown |
| Unsalted Butter 🧈 | 1 ½ cups | Cold, cubed for layers |
| Large Eggs 🥚 | 2 whole | Room temperature preferred |
| Baking Powder 🍃 | 2 tsp | Aluminum-free preferred |
| Salt 🧂 | ½ tsp | Fine sea salt |
| Ground Cinnamon 🌶️ | 1 ½ tsp | Freshly ground preferred |
| Ground Nutmeg 🌶️ | ¼ tsp | Freshly grated if available |
| Apples 🍎 | 4 medium | Honeycrisp or Granny Smith |
| Lemon Juice 🍋 | 2 tbsp | Freshly squeezed |
| Light Brown Sugar 🍚 | ½ cup | Packed firmly |
| Old-Fashioned Oats 🌾 | ½ cup | Blended into flour |
| Chopped Walnuts 🥜 | ½ cup | Toasted for extra flavor |
| Vanilla Extract 🌿 | 1 tsp | Pure vanilla preferred |
| Heavy Cream 🥛 | 1 cup | For whipped cream topping |
The apples are non-negotiable for that signature caramelized flavor. Honeycrisp gives you that perfect balance of sweet and tart, but Granny Smith works too if you want more tartness. I always buy mine from Whole Foods when they're in season—they're sweeter and hold up better to baking. Peel and slice them thin (about 1/4-inch thick) so they cook through without turning to mush. If you're using pre-sliced apples from the store, pat them dry really well to keep the streusel from getting soggy.
No Honeycrisp apples? Fuji or Gala are solid substitutes—they're sweet enough to caramelize nicely. Running out of walnuts? Pecans or almonds work just as well, though the flavor will be slightly different. The oats in the streusel can be swapped for crushed graham crackers if you're in a pinch, but they won't have the same texture. Want to make this nut-free? Skip the walnuts entirely and add an extra 1/4 cup of oats. The vanilla extract is worth splurging on—real Madagascar vanilla makes a world of difference compared to imitation.
This cake keeps beautifully for up to 3 days in an airtight container at room temperature, but honestly it's even better the next day once the flavors meld. For parties, assemble it a day ahead and refrigerate. The streusel topping stays crisp for 2 days if you cover it tightly. Freeze the fully assembled cake (without whipped cream) for up to 3 months
Why You'll Love This Recipe
- Foolproof Mix-In: I swear by the way this dough comes together—just fold in diced apples (peeled or not, no judgment) and you’re done. No fancy techniques, no waiting for dough to rest. That butter gets worked in until it’s the perfect crumbly texture, and the baking powder ensures it rises just enough to feel like a treat without the fuss.
- Buttery Apple Bliss: The moment that warm, golden cake hits your plate—crisp edges, tender crumb, and apples that caramelize just enough to make you groan—is why I make this weekly. That cold butter in the dough? It keeps it rich without tasting greasy, and the sugar? It’s the secret to that subtle sweetness that balances the tart apples like magic.
- Breakfast or Dessert: Honestly, I’ve served this for brunch with a dollop of whipped cream, as an after-school snack with cinnamon sugar, and even as a weekend dessert with a scoop of vanilla ice cream. The same recipe, different vibes. It’s the kind of cake that doesn’t demand a special occasion—it just fits.
- Leftovers? More Like Leftovers: Between us, this cake lasts forever in my house. Slice it up and freeze portions for quick grab-and-go breakfasts, or stash it in the fridge for a no-bake morning. And because it’s mostly flour, sugar, and butter, it’s one of those recipes where you’re not breaking the bank for something that tastes like a bakery made it. Win.
Step-by-step instructions for apple scone cake
This double-layered wonder delivers tender crumb, caramelized apple streaks, and a buttery crumb that'll make you forget it's a cake.
Prepare the Apple Filling
Peel, core, and slice the 4 medium apples into ¼-inch thick rounds. Toss them immediately with the 2 tablespoons lemon juice to prevent browning. In a small bowl, whisk together the ½ cup light brown sugar, 1 teaspoon vanilla extract, and 1 teaspoon cinnamon. Toss the apple slices with this mixture until evenly coated.
Here's the thing—don't skip the lemon juice. It keeps those apples bright and prevents that sad, dull gray color that kills the presentation. The brown sugar and cinnamon caramelize beautifully during baking, creating those gorgeous streaks you see in the finished cake. Spread the coated apples on a parchment-lined tray and set aside.
Make the Cake Batter
Preheat your oven to 350°F and grease two 8-inch round cake pans. In a large bowl, whisk together the 3 cups all-purpose flour, 2 teaspoons baking powder, ½ teaspoon salt, 1½ teaspoons cinnamon, and ¼ teaspoon nutmeg. Set aside.
In a separate bowl, beat the 1½ cups cold unsalted butter and 1½ cups granulated sugar together until light and fluffy—about 3-4 minutes with an electric mixer. Add the 2 room-temperature eggs one at a time, mixing well after each addition. Scrape down the sides of the bowl as needed.
Combine Wet and Dry Ingredients
Gradually add the dry ingredients to the wet mixture, mixing on low speed until just combined. The batter will be thick and crumbly—this is perfect for our scone-like texture. Stir in the ½ cup blended old-fashioned oats and ½ cup chopped walnuts until evenly distributed.
This is where the magic happens: the oats add texture, the walnuts bring crunch, and the cinnamon-nutmeg blend gives that warm spice aroma. If your batter seems too dry, add 1-2 tablespoons heavy cream to help bind it together. The goal is a thick, cohesive dough that holds its shape when pressed.
Assemble and Bake the Layers
Divide the batter evenly between the two prepared cake pans. Press down firmly to create an even layer—this is key for that scone-like texture. Arrange half of the apple slices on top of the first layer, pressing them gently into the batter. Repeat with the remaining batter and apples for the second layer.
Bake for 25-30 minutes until a toothpick inserted into the center comes out clean and the edges are golden brown. I like to rotate the pans halfway through baking for even color. The apples should be tender and caramelized, with those beautiful streaks peeking through the crumb.
Finish with Whipped Cream
Let the cakes cool in their pans for 10 minutes, then transfer to a wire rack to cool completely. While they cool, whip the 1 cup heavy cream with a hand mixer until soft peaks form. Spread a generous layer of whipped cream between the two cake layers and on top of the entire cake.
Here's the moment that matters: serve immediately while the cake is still warm. The contrast of the tender cake, caramelized apples, and cool whipped cream is pure perfection. Each bite delivers that buttery crumb, spiced apple filling, and creamy finish that makes this cake feel like a hug in dessert form.
Pro Tips For Making Apple Scone Cake
- Chill the Dough First: I learned this the hard way—skipping the 30-minute fridge rest makes the butter melt into a greasy mess instead of flaky layers. Cold dough = better texture, no excuses.
- Cut Butter in Small Pieces: Big chunks of butter won’t incorporate evenly, and you’ll end up with dense scone cake. Use a fork to break the cold butter into pea-sized pieces before mixing—this way, it distributes smoothly without turning the dough into soup.
- Don’t Overmix the Batter: The moment your dough looks like pancake batter, stop. Overmixing develops gluten, and your cake turns tough instead of tender. Stir just until the dry ingredients disappear—about 10 seconds past that.
- Use Room-Temp Eggs: Cold eggs make the batter lumpy and can cause uneven baking. Let them sit out for 15–20 minutes before cracking them in—smooth batter = even rise, no guessing.
Perfect pairings for this recipe
Creamy Toppings
Whipped cream is my go-to topping for this cake—it balances the spiced apples beautifully. Use 1 cup heavy cream chilled overnight for the best texture. For extra decadence, fold in 1 tablespoon powdered sugar and ½ teaspoon vanilla extract before whipping. A dollop on each slice adds that light, airy contrast to the dense cake layers. 🥛
Fruity Complements
Fresh berries make a stunning presentation and add a bright acidity that cuts through the richness. I love raspberries or blackberries arranged in a circular pattern on top. For a more autumnal touch, add thinly sliced pears or figs alongside the apples. A drizzle of warm caramel sauce ties everything together with its buttery-sweet notes.
Spiced Syrups
Warm spices elevate the apple flavors even further. Try a cinnamon syrup made by simmering ½ cup water, ½ cup sugar, and 1 cinnamon stick for 5 minutes. Drizzle over slices just before serving. For a boozy twist, add 1 tablespoon bourbon or apple brandy to the syrup. This adds depth and makes the cake feel extra special for gatherings. 🍯
Crunchy Additions
Toasted nuts bring texture contrast that keeps every bite interesting. Sprinkle crushed pecans or candied walnuts on top before serving. For a festive touch, use candied ginger or dried cranberries—both add a chewy texture and vibrant color. These toppings also help absorb any excess creaminess, balancing the plate perfectly.
Coffee Pairings
This cake pairs wonderfully with strong coffee or tea. A dark roast espresso enhances the apple and spice flavors, while chai tea complements the cinnamon and nutmeg. For a dessert-focused pairing, serve with vanilla bean ice cream or honey butter to create a full flavor experience. The warmth of the cake contrasts beautifully with cool dairy toppings. ☕
Nutrition facts
Frequently asked questions
Can I make this apple scone cake in a single layer instead of two? Yes, you can absolutely bake it as a single 9-inch layer cake! Simply use one cake pan and reduce the baking time to 20-25 minutes. The texture will be slightly denser but still delicious. For presentation, add extra whipped cream and fruit toppings to make it feel special. Just
Why does my batter look too dry? Can I fix it?
This thick, crumbly texture is actually perfect for the scone-like quality! If it seems too dry, add 1-2 tablespoons heavy cream or milk to help bind it together. Mix gently until just combined—overmixing can make the cake tough. The batter should hold together when pressed but still be workable. If it's still too dry, try adding 1 extra tablespoon of cream and see how it feels.
How do I store leftovers without drying out the cake?
Store your cake in an airtight container at room temperature for up to 3 days. To refresh slices, warm them briefly in the oven at 300°F for 5-8 minutes or cover with a damp paper towel in the microwave for 10-15 seconds. For longer storage, freeze the fully assembled cake (without whipped cream) for up to 3 months. Thaw overnight in the fridge before serving.
Can I substitute the apples with another fruit?
Yes! Try pears, berries, or even pineapple for a tropical twist. For best results, use fruits that hold their shape when baked (like pears) and adjust the sweetness—tart fruits like berries may need extra sugar. If using softer fruits, reduce the baking time by 2-3 minutes to prevent overcooking. The key is maintaining that caramelized flavor, so choose fruits that will soften nicely during baking.
What's the secret to getting that perfect caramelized apple look?
The secret is in the prep! Slice apples ¼-inch thick and toss them with lemon juice immediately to prevent browning. Use a mix of sweet (Honeycrisp) and tart (Granny Smith) apples for balanced flavor. Spread them out on a tray before baking to ensure even caramelization. Bake at 350°F for the full 25-30 minutes—this gives the apples time to soften and develop those beautiful streaks.