
Desserts
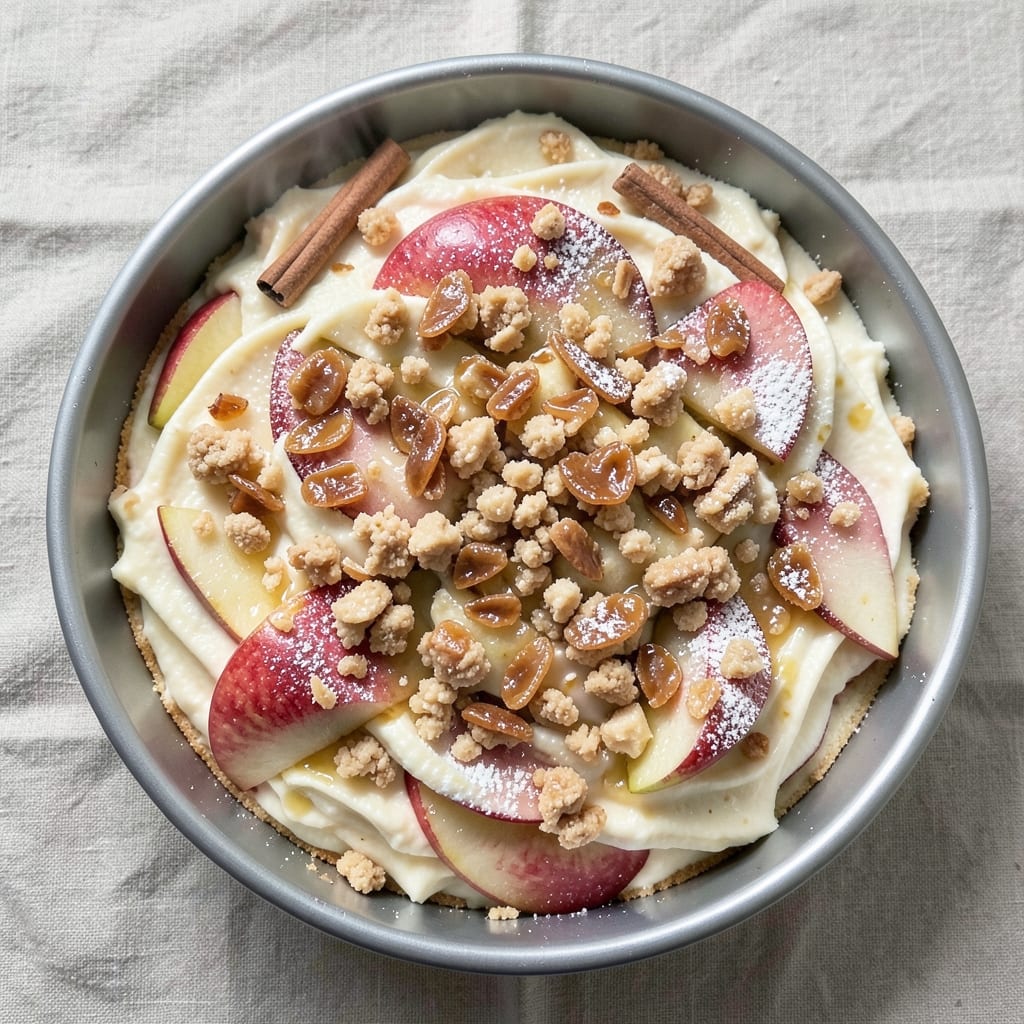
This apple pie crumble cheesecake recipe transforms three beloved desserts into one showstopping masterpiece—creamy cheesecake meets spiced apple filling topped with a buttery crumble. The secret lies in baking the cheesecake base first, then layering it with warm apple pie filling before adding the crumble topping, ensuring each component stays perfectly textured. No soggy bottoms or overcooked toppings here—just a harmonious balance of rich, tangy, and sweet flavors that will have everyone asking for seconds.
The triple-layered approach starts with a dense, crack-resistant cheesecake base that supports the weight of the apple filling and crumble. Then comes the star: a spiced apple mixture that’s neither too runny nor too dry, holding its shape while delivering that classic apple pie taste. Finally, the crumble topping—browned to golden perfection—adds a delightful contrast in texture, its buttery crunch cutting through the creamy cheesecake and tender apples. Each layer is designed to complement the others, creating a dessert that’s as impressive to look at as it is to eat.
What makes this recipe truly special is the technique of layering and timing. The cheesecake base bakes first, then cools while you prepare the apple filling and crumble. Once assembled, the dessert goes back in the oven just long enough to warm the filling and crisp the topping without melting the cheesecake. The result? A dessert that’s restaurant-quality at home, with a velvety center, a caramelized crumble, and the comforting aroma of cinnamon-spiced apples filling your kitchen.
Perfect for holidays, dinner parties, or when you want to impress without spending hours in the kitchen, this fusion dessert delivers three desserts in one. The best part? It’s easier than it looks—just follow the layering order, and you’ll achieve that professional finish every time. Let’s get baking!
Ingredients for apple pie crumble cheesecake
Pantry staples meet seasonal produce—three desserts in one perfect bite.
| Ingredient | Amount | Notes |
|---|---|---|
| Cream Cheese (Full-Fat) 🧀 | 16 oz | Room temperature for blending |
| Granulated Sugar 🍚 | 1 ½ cups | White or light brown |
| Large Eggs 🥚 | 4 whole | Room temperature |
| All-Purpose Flour 🌾 | ½ cup | Sifted for smooth batter |
| Vanilla Extract 🌿 | 1 tbsp | Pure alcohol-free preferred |
| Granny Smith Apples 🍎 | 6 medium | Peeled, cored, diced |
| Light Brown Sugar (Packed) 🍚 | ¾ cup | For apple filling sweetness |
| Lemon Juice 🍋 | 2 tbsp | Freshly squeezed |
| Ground Cinnamon 🌶️ | 2 tsp | Freshly toasted for depth |
| Allspice 🌶️ | ½ tsp | Or sub nutmeg |
| Old-Fashioned Rolled Oats 🌾 | 1 ½ cups | Quick or old-fashioned |
| Cold Unsalted Butter 🧈 | ¾ cup | Cubed for crumble texture |
| Salted Butter (Melted) 🧈 | ¼ cup | For crumble binding |
| Diamond Crystal Kosher Salt 🧂 | ½ tsp | For crumble seasoning |
| Vanilla Bean Seeds 🌿 | 1 tsp | Scraped from 1 pod |
The cream cheese is non-negotiable—Philadelphia full-fat gives that velvety texture. Grab a block, not tub, for best quality. Trader Joe's sells it pre-sliced for convenience, but I always buy the full wheel at Whole Foods—keeps longer. For the apples, Granny SmithsHoneycrisp or Fuji work too, but they'll get softer faster. The vanilla? Madagascar bourbon extract adds depth, but pure vanilla works if that's all you've got. Toast your spices in a dry pan for 30 seconds—that smoky note makes all the difference.
No Granny Smiths? Mix Honeycrisp and Braeburn for similar tartness. Running low on vanilla? Almond extract at half the amount adds complexity. The crumble topping is where you can get creative—swap oats for crushed graham crackers if you're in a hurry. For the butter, European-style (like Plugra) gives more flavor than regular salted. The crumble needs to be cold when mixed—cut the butter into the oats with a pastry cutter or your fingers for that perfect sandy texture. If you're making this ahead, bake the crumble separately and assemble just before serving to keep it crisp.
This dessert is a make-ahead dream. The cheesecake base keeps 3 days in the fridge, the apple filling 2 days, and the crumble topping 5 days if stored in an airtight container. Assemble everything the night before and refrigerate—the flavors meld beautifully. If you're serving it warm, bake the assembled dessert at 350°F for 15-20 minutes until the crumble is golden and the filling is bubbly. Leftovers? Store in individual portions—it's too good to wait. The crumble stays crisp for 2 days if kept covered, but honestly, it disappears faster than that.
Why You'll Love This Recipe
- No-Bake Magic: I swear by this recipe when I need dessert fast—just whip the cream cheese and sugar, fold in eggs, and bake. The crumble topping comes together in minutes with flour, sugar, and a handful of apples. Honestly, it’s the kind of dessert that feels fancy but takes less effort than boiling water.
- Two Flavors in One: That buttery crumble on top? It’s like biting into warm apple pie, but the creamy, vanilla-kissed cheesecake underneath keeps it rich and smooth. I’ll be real: my husband always asks for seconds because he can’t decide which part he loves more.
- Weeknight Crowd-Pleaser: This is my go-to for dinner parties or when my kids’ friends are over—it’s sweet enough for little ones but sophisticated enough for adults. Plus, the apples add freshness that cuts through the richness, so no one feels like they’re eating dessert too heavy.
- Leftovers That Last: The best part? It tastes just as good the next day, cold or warmed slightly. Between us, I’ve reheated slices for breakfast (yes, really) and packed them for lunches. The crumble stays crisp, and the cheesecake holds its shape—no soggy mess here.
Step-by-step instructions for apple pie crumble cheesecake
Here's how to build this triple-layered masterpiece with perfect textures every time.
Prepare the Cheesecake Base Layer
Preheat your oven to 350°F and grease a 9-inch springform pan. In a large bowl, beat the 16 oz cream cheese (full-fat) until completely smooth, about 3-4 minutes with an electric mixer. This step is crucial—any lumps will show up in your final texture.
Gradually add the 1.5 cups granulated sugar while mixing on medium speed until fully combined. The mixture should be pale and thick. Add the 4 whole large eggs (room temperature) one at a time, mixing just until each is incorporated. This gentle approach prevents overmixing that can make the cheesecake dense.
In a separate bowl, whisk together the 0.5 cup all-purpose flour (sifted), 2 tsp ground cinnamon, 0.5 tsp allspice, and 0.5 tsp diamond crystal kosher salt. Gently fold this dry mixture into the cheesecake batter until just combined. Pour the batter into your prepared pan and smooth the top with a spatula.
Assemble the Apple Filling Layer
While the cheesecake base bakes, prepare the apple filling. In a large skillet over medium heat, combine the 6 medium granny smith apples (peeled, cored, diced), 0.75 cup light brown sugar (packed), 2 tbsp lemon juice, and 1 tsp vanilla bean seeds. Cook for 8-10 minutes until the apples soften and release their juices.
Use a potato masher or fork to lightly crush the apples, leaving some texture. You want a filling that's chunky but still saucy enough to soak into the cheesecake layer. Taste and adjust sweetness if needed—Granny Smiths can be tart. Remove from heat and stir in 1 tbsp vanilla extract.
Create the Oat Crumble Topping
In a medium bowl, combine the 1.5 cups old-fashioned rolled oats, 0.75 cup cold unsalted butter (cubed), and remaining 0.5 tsp diamond crystal kosher salt. Use your fingers or a fork to work the butter into the oats until the mixture resembles coarse crumbs with some pea-sized butter pieces remaining.
This texture is key—you want a crumbly topping that will become golden and crispy, not a dense oat cake. If the mixture seems too dry, add 1 tablespoon of cold water to help bind it. Spread the oat mixture evenly over the apple filling in the springform pan, pressing down gently with your fingers.
Bake the Triple-Layered Cheesecake
Place the springform pan on a baking sheet (to catch any potential drips) and bake for 50-55 minutes until the edges are golden brown and the center has just set. The cheesecake layer should still have a slight wobble when gently shaken—it will firm up as it cools.
Here's the thing—don't overbake. The cheesecake will continue setting as it cools. When the top looks set but still slightly jiggly in the center, remove from the oven. Let it cool in the oven for 10 minutes with the door slightly ajar, then transfer to a wire rack to cool completely.
Chill and Serve
Refrigerate the cheesecake for at least 4 hours or overnight before serving. This chilling time is non-negotiable—it allows all the layers to set properly and develop their full flavors. When ready to serve, run a knife around the edge of the pan to loosen it, then release the springform.
Slice into wedges with a warm knife for clean cuts. Each bite should deliver creamy cheesecake, spiced apple filling, and crunchy oat topping. For extra presentation, garnish with a sprinkle of cinnamon or a dollop of whipped cream. Serve at room temperature for the best texture contrast between the layers.
Pro Tips For Making Apple Pie Crumble Cheesecake
- Beat Cream Cheese Slowly: I learned this the hard way—dumping cold cream cheese into the mixer and blitzing it at high speed just makes it seize up. Instead, let the cream cheese sit at room temperature for 30 minutes first, then beat it on medium speed while gradually adding sugar. This keeps the fat from separating and gives you that silky texture you’re after.
- Whisk Eggs First: Crack your eggs into a separate bowl before adding them to the cream cheese mixture. That way, you can whisk out any stray shells or that weird floaty membrane that always seems to sneak in. Trust me, you don’t want a gritty bite in your cheesecake.
- Skip the Overmixing: Once you’ve folded in the flour and vanilla, stop mixing the second everything comes together. Overworking the batter introduces too much air, which leads to cracks during baking. Just a few gentle stirs until the dry ingredients disappear—that’s all it takes.
- Bake in Stages: Start your cheesecake at 325°F (163°C) for 20 minutes, then drop the heat to 275°F (135°C) for the remaining 40-50 minutes. The lower temp prevents a domed top and lets the center set without burning the edges. Yes, it’s slower, but it’s worth it for that clean finish.
Wine and beer pairings for these flavors
Sweet Dessert Wines
This rich, spiced dessert calls for wines with enough sweetness and acidity to stand up to the creamy cheesecake and tart apples. A Moscato d'Asti from Italy is my go-to—its light body and floral notes complement the crumble topping beautifully. For something more robust, try a Riesling from Germany's Mosel region, particularly a Spätlese or Auslese, which balances the dessert's sweetness with bright citrus and honeyed apple flavors. 🍷
Spiced Red Wine Pairings
If you prefer red, a Pinot Noir with a touch of residual sugar works wonders. Look for one from Oregon's Willamette Valley—these wines often have red fruit notes that harmonize with the apple filling. For a bolder option, a Port-style Ruby Port adds a luxurious depth that mirrors the dessert's layered complexity. Serve slightly chilled to enhance the fruit flavors.
Craft Beer Contrasts
For beer lovers, a Belgian Witbier like Hoegaarden or Stella Artois offers a crisp, citrusy contrast that cuts through the richness. The coriander notes in these beers pair surprisingly well with the cinnamon-spiced apples. If you're feeling adventurous, try a Brown Ale—its caramel and toffee undertones echo the dessert's buttery crumble and caramelized apples. Serve the beer at 45-50°F for the best balance. 🍺
Coffee or Tea Pairings
Skip the alcohol entirely and serve with a strong brewed coffee—the bitterness of a dark roast or espresso cleanses the palate between bites. For a lighter option, a chai tea latte with cinnamon and cardamom enhances the dessert's spiced apple flavors. I love a vanilla chai for its creamy, aromatic notes that mirror the cheesecake layer.
Seasonal Adaptations
In summer, opt for a dry Riesling to refresh your palate, while winter calls for a Banyuls or Tawny Port—their nutty, oxidative qualities pair beautifully with the dessert's warm spices. For a non-alcoholic option, a sparkling apple cider (like Martinelli's) adds a festive touch, especially during the holidays. The bubbles help cut through the richness of the cheesecake.
Nutrition facts
Frequently asked questions about apple pie crumble cheesecake
Can I make this dessert ahead of time?
The cheesecake base keeps for 3 days in the fridge, while the apple filling lasts 2 days and the crumble topping stays fresh for 5 days in an airtight container. Assemble everything the night before and refrigerate—this lets the flavors meld beautifully. For serving warm, bake the assembled dessert at 350°F for 15-20 minutes just before guests arrive.
Why does my crumble topping get soggy?
Soggy crumble usually happens when the topping isn't crisped enough or the cheesecake base isn't fully set. Always bake the crumble layer until golden brown, and let the cheesecake cool completely before adding the apple filling. For extra insurance, sprinkle a thin layer of crushed graham crackers between the cheesecake and apple filling to create a barrier.
What's the best way to slice this dessert?
Use a warm knife for clean cuts! Dip your knife in hot water, wipe it dry, and slice through the cheesecake. This prevents crumbling and ensures each piece has all three layers. For extra presentation, dust the slices with powdered sugar or a sprinkle of cinnamon before serving.
Can I substitute the oat crumble for something else?
Yes! For a nutty twist, try crushed pecans or walnuts mixed with the oats. If you prefer a cookie-like texture, use chopped ginger snaps or graham cracker crumbs instead. Just be sure to adjust the butter ratio to maintain the crumble consistency—aim for a 1:1 ratio of dry to fat.
How do I make this dessert gluten-free?
Replace the all-purpose flour in the cheesecake with gluten-free 1:1 baking flour and use certified gluten-free oats for the crumble. For the crumble topping, ensure your butter is gluten-free (many brands are, but always check labels). The texture will be slightly different but still delicious—just expect a denser crumble layer.