
Desserts
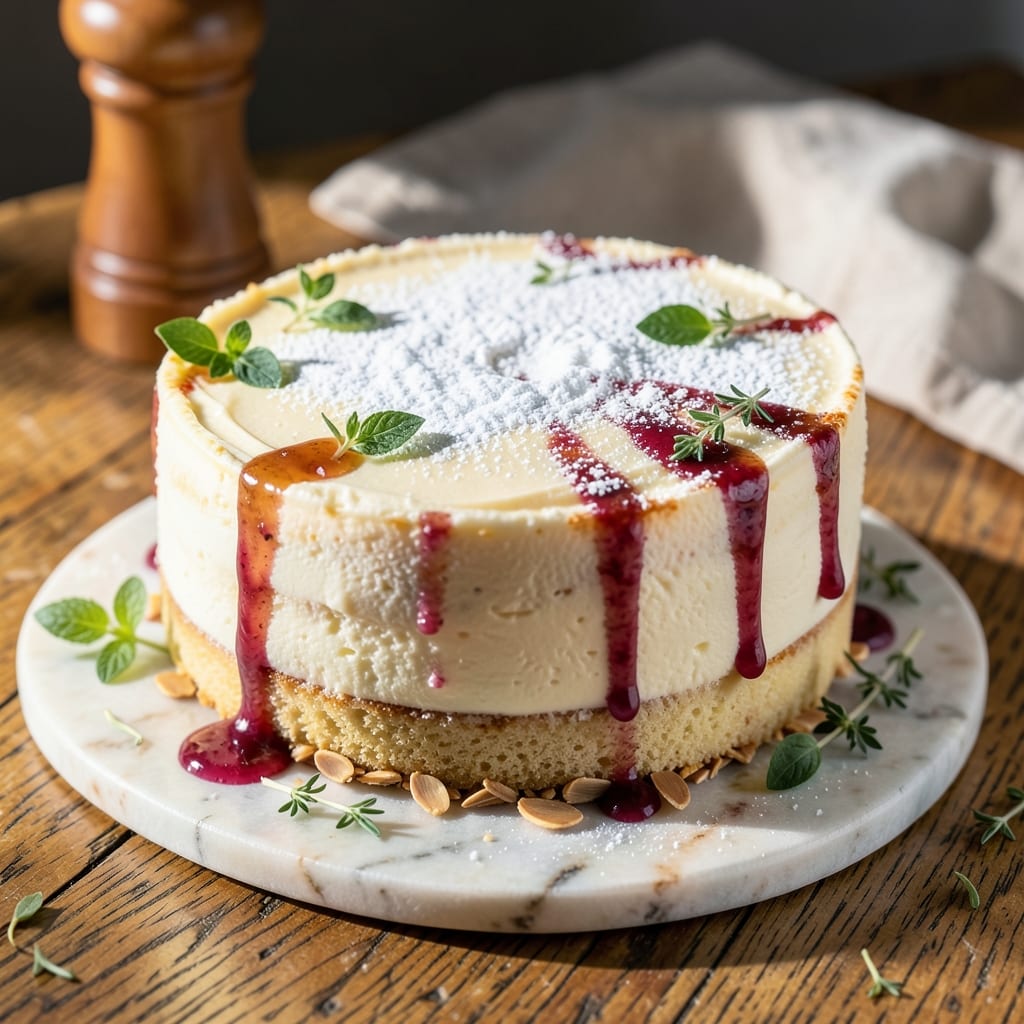
This amazing sponge cake recipe delivers layers so light they practically disappear on your tongue—no dense crumbs in sight. 💛 I've perfected the technique over years of baking disasters (and a few triumphs), and the secret lies in properly whipped egg whites and a delicate folding method that keeps the structure airy yet stable enough to hold frosting. What makes this recipe special is the balance between butter and eggs—just enough butter for richness without weighing down the delicate crumb, while the egg whites create those signature air pockets. The cake bakes up golden and tender, with a fine crumb that practically melts when you cut into it. No special equipment needed, just patience and a steady hand when folding the batter. By the time you're done, you'll have a cake that's light enough to be called "angel food" but rich enough to satisfy serious dessert lovers. The layers stay moist for days, making it perfect for birthdays, celebrations, or just because. Trust me—this is the sponge cake that will make you question why you ever bought boxed mix. Ready to bake? We'll start with room-temperature ingredients and work our way through the folding technique that makes all the difference. Let's get started!
Ingredients for amazing sponge cake
Room-temperature ingredients and patience create this melt-in-your-mouth sponge cake.
| Ingredient | Amount | Notes |
|---|---|---|
| Large Egg Whites 🥚 | 8 whole | Room temperature, separated carefully |
| Large Egg Yolks 🥚 | 4 whole | Room temperature, separated carefully |
| Granulated Sugar 🍚 | 1 ½ cups | Superfine preferred for smoothness |
| Unsalted Butter 🧈 | ¾ cup | Room temperature, European style preferred |
| All-Purpose Flour 🌾 | 1 ½ cups | Sifted, plus extra for dusting |
| Cream of Tartar 🧂 | ¼ tsp | Stabilizes egg whites |
| Vanilla Extract 🌿 | 1 tsp | Pure, high-quality extract |
| Salt 🧂 | ¼ tsp | Fine sea salt preferred |
| Cake Flour 🌾 | ½ cup | Optional for ultra-light texture |
| Lemon Zest 🍋 | 1 tbsp | Freshly grated for brightness |
| Cornstarch 🌾 | 1 tbsp | For extra stability |
The butter and eggs need to be room temperature—this is non-negotiable. European-style butter (like Plugrá) has higher fat content, which gives you that perfect buttery richness without overpowering. Grab a digital thermometer if you're unsure—both should be around 65°F. For the sugar, superfine is ideal (like Domino brand), but if you only have regular granulated, pulse it in a food processor for a few seconds. The cake flour is optional but makes a noticeable difference—it's what gives that signature fine crumb. Bob's Red Mill is my go-to brand, but any quality brand works.
No cream of tartar? Lemon juice at half the amount works in a pinch, but it won't stabilize the egg whites as well. Want to skip the vanilla extract? Almond extract at one-quarter the amount adds depth without overpowering. The lemon zest can be dried if you're prepping ahead—just toast it gently in a dry pan for 2 minutes, then grind it. For the flour, sift it twice if you can—this removes lumps and gives you that ultra-light texture. And if you're making multiple layers, preheat your pans before adding the batter—it bakes up more evenly.
This batter is delicate—don't overmix after folding. Use a rubber spatula and work quickly but gently. The cake keeps best in an airtight container with a slice of bread on top (keeps it moist longer). If you're not using it all at once, wrap each layer tightly in plastic and store in the fridge for up to 3 days. For longer storage, freeze the unfrosted layers for up to 3 months. Let them thaw completely at room temperature before assembling.
Why You'll Love This Recipe
- I’ll be real: beating egg whites to stiff peaks used to stress me out. But this sponge? The yolks and sugar get whipped just until pale—no overthinking, no deflating. That butter gets folded in like a dream, and suddenly you’ve got a light, airy cake without the arm workout.
- No Whisking Madness: I’ll be real: beating egg whites to stiff peaks used to stress me out. But this sponge? The yolks and sugar get whipped just until pale—no overthinking, no deflating. That butter gets folded in like a dream, and suddenly you’ve got a light, airy cake without the arm workout.
- Butter-Sugar Magic: Here’s what sold me—the way the butter and sugar melt together in the oven. The edges get this golden, crisp crackle while the center stays tender, almost like a cloud. (Yes, even on a Tuesday night.) It’s the kind of cake that makes you pause mid-bite to appreciate how good it actually is.
- Layer or Stand Alone: Between us, this sponge plays well with others. Slice it thin for trifles, stack it with jam and cream for a fancy dessert, or eat it plain with tea—no judgment. I’ve even used leftover pieces to make French toast the next morning. Versatile? More like magic trick versatile.
Step-by-step instructions for light-as-air sponge cake
Here's how to create that perfect cloud-like texture with stable layers every time.
🍳 Step 1: Whip Egg Whites to Stiff Peaks
First, separate the 8 whole large egg whites from the 4 whole large egg yolks, making sure no yolk touches the whites or they won't whip properly. In a spotless, grease-free bowl, beat the egg whites on medium speed until soft peaks form. Add the 0.25 teaspoon cream of tartar and 0.25 teaspoon salt to stabilize them.
Gradually add the 1.5 cups granulated sugar, about 1 tablespoon at a time, increasing the speed to high. You're looking for glossy, stiff peaks that hold their shape when you lift the beaters—this usually takes about 5-7 minutes. The bowl should feel cool to the touch, and the meringue should be thick enough to hold its shape when you turn the bowl upside down. This is your foundation for that signature light-as-air texture.
👨🍳 Step 2: Mix Yolks with Butter and Flour
In a separate bowl, combine the 4 whole large egg yolks with the 1.5 cups all-purpose flour, 0.5 cup cake flour, and 1 tablespoon lemon zest. Whisk gently until just combined—don't overmix or you'll develop gluten and lose that tender crumb. In a small saucepan, melt the 0.75 cup unsalted butter over low heat, then let it cool slightly.
With the mixer on low speed, slowly drizzle in the melted butter while adding the 1 teaspoon vanilla extract. Mix until fully incorporated and the batter is smooth. Here's the thing—this step creates the rich, buttery flavor that balances the airy texture. Don't rush it; let the butter cool enough so it doesn't cook the eggs when you combine everything next.
🥘 Step 3: Fold Everything Together Gently
Now for the delicate part: folding. Using a spatula, gently fold about one-third of the egg white meringue into the yolk mixture to lighten it. Then, add the remaining meringue in two more additions, being careful to cut through the center and gently fold from the bottom up. You're looking for a smooth, ribbon-like consistency that falls slowly when you lift the spatula.
I know it seems weird, but trust me—this folding technique incorporates air without deflating the meringue. If the batter looks curdled or loses volume, you've overmixed. The 1 tablespoon cornstarch helps stabilize the structure, so don't skip it. Once fully combined, the batter should be thick but pourable, with no streaks of flour visible.
⏰ Step 4: Bake in Two Thin Layers
Preheat your oven to 350°F and line two 8-inch round cake pans with parchment paper. Divide the batter evenly between the pans and smooth the tops. Bake for 12-15 minutes until the edges are set and the centers spring back when gently pressed. Here's the secret—these thin layers bake faster and more evenly than one thick layer, giving you that perfect rise.
Don't overbake! The cakes should read 205-210°F at the center when checked with an instant-read thermometer. Remove from the oven and let cool in the pans for 5 minutes, then transfer to a wire rack to cool completely. This gradual cooling prevents cracking and maintains that delicate structure we worked so hard to create.
🍽️ Step 5: Assemble with Buttercream (Optional)
Once completely cool, place one layer on a plate and spread a thin layer of your favorite buttercream (I use a simple butter + powdered sugar version). Dust with lemon zest for that bright citrus note. Place the second layer on top and repeat. For extra stability, you can add a thin layer of jam between the cakes—this prevents shifting when you slice.
This is where the magic happens. The light-as-air sponge layers combined with the rich buttercream create that perfect balance of texture and flavor. Serve immediately or refrigerate for up to 24 hours—just bring to room temperature before serving for the best texture. The cake should be tender, moist, and effortlessly light, with no dense or gummy spots.
Pro Tips For Making Amazing Sponge Cake
- Fold the Flour Gently: I learned this the hard way—dumping flour all at once deflates your egg whites faster than a sad balloon. Sift it in first, then fold in just 1/3 of the flour with a spatula once before adding the rest. The goal is to keep those air pockets intact, not turn your batter into a dense brick.
- Separate Eggs at Room Temp: Cold eggs from the fridge won’t whip as stiff or blend as smoothly. Pop them out 30 minutes before you start—yes, even if you’re impatient like me—and let them sit in a bowl. Warm yolks cream better with butter, and whites hold peaks like a champ when they’re not fighting against the cold.
- Don’t Overmix the Butter: After burning three batches of sponge cake, I finally figured out the butter-yolk mix should look like wet sand, not pancake batter. Beat the butter and sugar until just combined, then add yolks one at a time—no need to overwork it. Overmixing adds gluten, and that’s the enemy of a light, airy crumb.
- Use Room-Temp Butter: Sounds weird, but it works: take your unsalted butter out of the fridge 2 hours before baking. Cold butter creates pockets that don’t melt evenly, leading to a cake that’s dense in spots and dry in others. Room-temp butter blends smoothly and ensures even moisture—no one wants a sponge cake that’s basically a dry sponge.
Perfect pairings for amazing sponge cake
Citrus Brightness
Fresh lemon zest and juice add a zesty brightness that cuts through the richness of the buttercream. I like to zest 1 lemon and add 1 tablespoon of zest to the batter, then juice 1 teaspoon to fold into the buttercream. For extra pop, brush the cake layers with a simple syrup made from 2 tablespoons sugar and 2 tablespoons water before assembling. This keeps the sponge moist and adds a subtle sweetness. 🍋
Creamy Fillings
Classic vanilla buttercream is a must, but don’t stop there. Try a lemon curd filling for a tangy twist—simmer ½ cup sugar, ¼ cup lemon juice, and 2 egg yolks until thickened, then strain and chill. For a lighter option, whip 8 oz cream cheese with ½ cup powdered sugar and 1 teaspoon vanilla for a silky filling. A thin layer of raspberry jam also adds moisture and prevents dryness.
Chocolate Twist
Swap the vanilla extract for 1 tablespoon cocoa powder mixed into the yolk batter, then fold in ½ cup melted dark chocolate (70% cocoa) for a decadent chocolate sponge. Pair it with a hazelnut buttercream made from ½ cup toasted hazelnut butter and ½ cup buttercream. Dust with cocoa powder or chocolate shavings for a stunning finish. The contrast of airy sponge and rich chocolate is unforgettable. 🍫
Fruit Toppings
Fresh berries or sliced citrus make stunning toppings. Arrange raspberries, strawberries, or orange segments on top of the assembled cake for a vibrant look. For a tropical vibe, add mango purée or passion fruit curd between layers. If using delicate fruits, add them just before serving to keep them fresh. A drizzle of white chocolate ganache ties everything together beautifully.
Coffee Infusion
For a sophisticated touch, infuse the buttercream with 1 tablespoon instant espresso powder dissolved in 1 tablespoon hot water. Alternatively, add ½ teaspoon vanilla bean paste and a pinch of cinnamon to the batter for warmth. Pair with a mocha glaze made from ½ cup powdered sugar, 2 tablespoons heavy cream, and 1 teaspoon cocoa powder**. This combo is perfect for coffee lovers and holiday desserts. ☕
Nutrition facts
Frequently asked questions
Why does my sponge cake turn out dense instead of light?
The most common culprits are overmixing the batter or not whipping the egg whites to stiff peaks. Make sure your egg whites are completely free of yolk and whip them until they hold their shape when the beaters are lifted. Also, fold the meringue gently—don't stir vigorously once combined. Room-temperature ingredients are key too!
Can I make this sponge cake without a mixer?
Use a hand mixer or even a whisk for the egg whites—just be patient and whip longer to reach stiff peaks. For the yolk mixture, a whisk works fine, but fold the meringue by hand with a spatula. The key is gentle, deliberate movements to preserve those air pockets. It takes more effort but yields the same light result!
What's the best way to store leftover sponge cake?
For short-term storage, keep it in an airtight container with a slice of bread on top to maintain moisture. It stays fresh for 3 days at room temperature. For longer storage, freeze unfrosted layers wrapped tightly in plastic for up to 3 months. Always thaw completely before assembling.
How do I prevent my cake layers from cracking?
Cracking usually happens from uneven cooling or overbaking. Let the cakes cool in their pans for 5 minutes before transferring to a rack. Also, check the center temperature—it should be 205-210°F when done. Avoid opening the oven door during baking, and don't overfill the pans (batter should be about 1 inch deep).
Can I substitute cake flour with all-purpose flour?
Yes, but you'll need to make an adjustment. Replace each 1 cup of cake flour with 1 cup minus 2 tablespoons of all-purpose flour plus 2 tablespoons cornstarch. This maintains the light texture. The cake will still be delicious, but the crumb might be slightly denser than with cake flour.